Camera Serial Interface (CSI)
Currently, RUBIK Pi 3 is compatible with the camera modules listed in Peripheral Compatibility List. The following table lists the supported resolutions for each camera module.
| Resolution | Aspect Ratio | IMX477 | IMX708 | IMX219 |
|---|---|---|---|---|
| 4056 x 3040 | 4:3 | Yes | No | No |
| 4608 x 2592 | 16:9 | No | Yes | No |
| 3280 x 2464 | 4:3 | No | No | Yes |
| 1920 x 1080 | 16:9 | Yes | No | No |
| 1632 x 1224 | 4:3 | No | No | Yes |
-
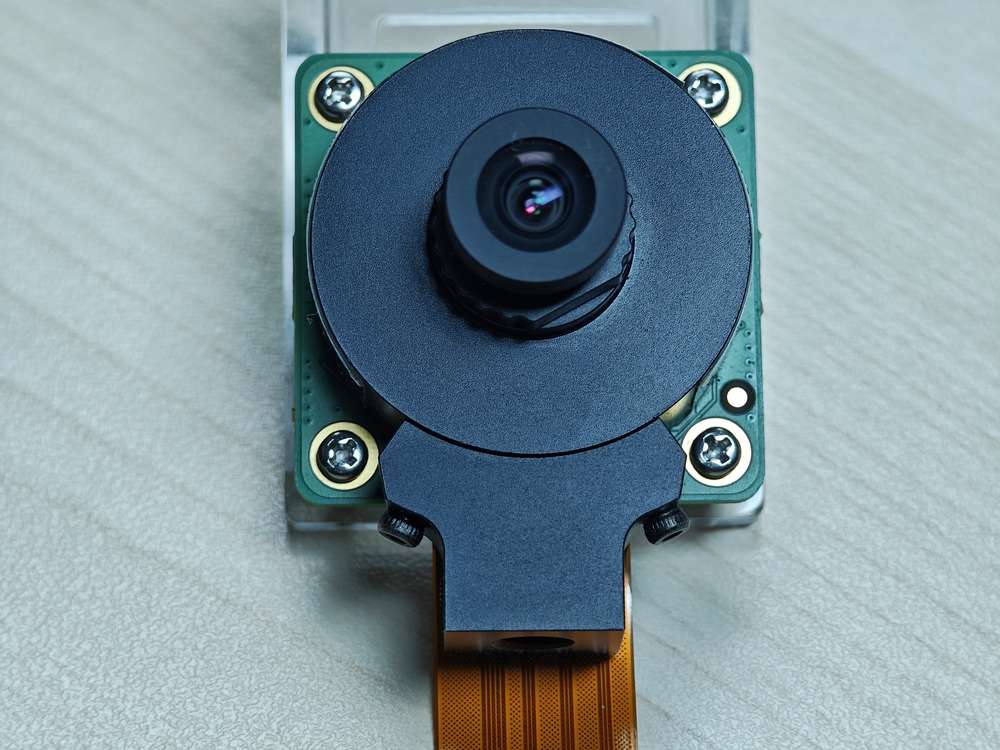
HQ Camera (IMX477/M12 Mount)
-
Camera Module 2 (IMX219)
noteCurrently, RUBIK Pi 3 only supports the standard Camera Module 2 and does not support the wide-angle or NoIR versions.
-
Camera Module 3 (IMX708)
noteCurrently, RUBIK Pi 3 only supports the standard Camera Module 3 and does not support the wide-angle or NoIR versions. The current software version does not support the autofocus (AF) function of the Module 3 camera.
Connect the camera cable
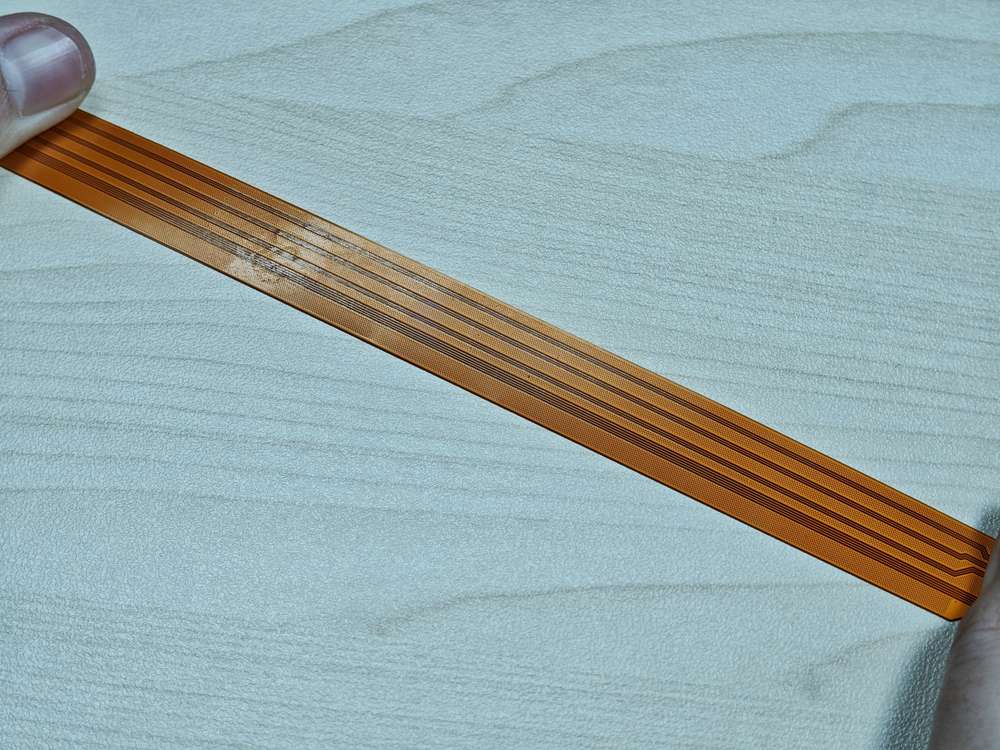
RUBIK Pi 3 supports the 22-pin FPC with a 0.5mm pitch and a 0.3±0.05mm thickness. For the compatible accessory, refer to Peripheral Compatibility List.
Never plug or unplug the camera module while the board is powered on, as this can easily damage the camera module.
-
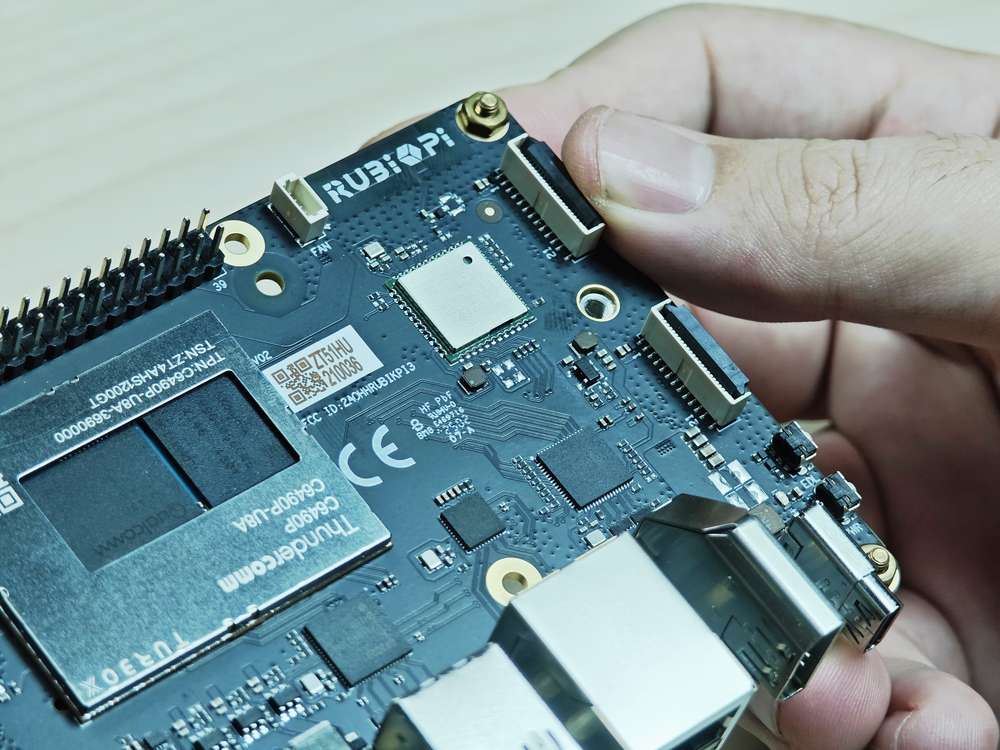
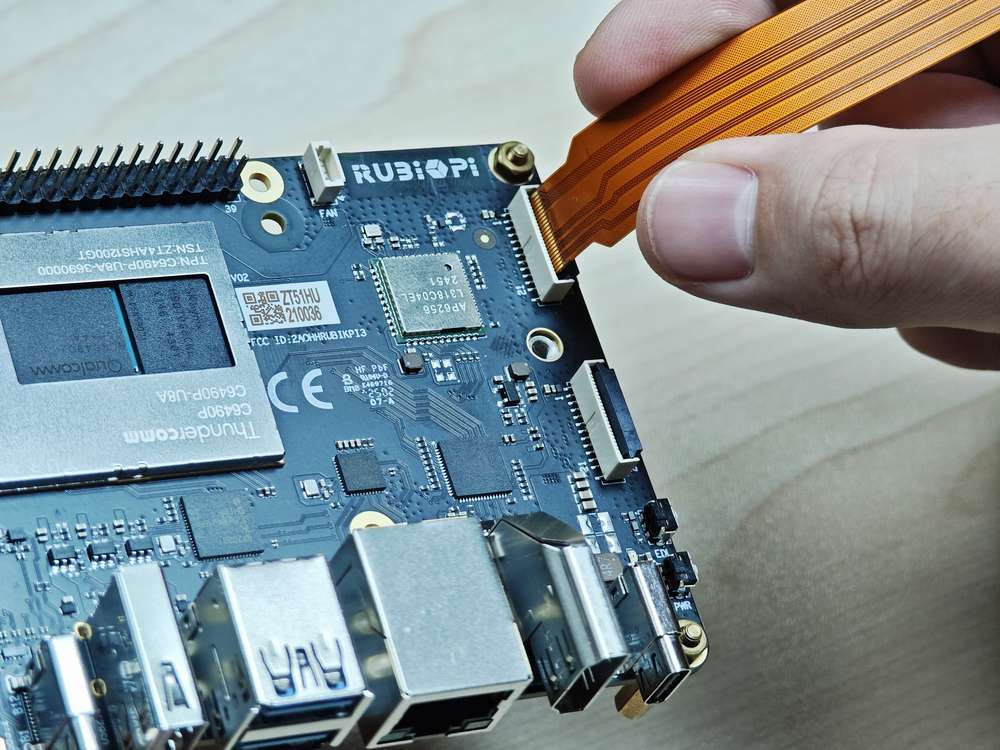
Pull up the lock of the connector.
-
Insert the FPC. Ensure that the contacts are toward the center of RUBIK Pi 3.
-
Press the lock down to ensure that the FPC is properly connected.
Use cameras
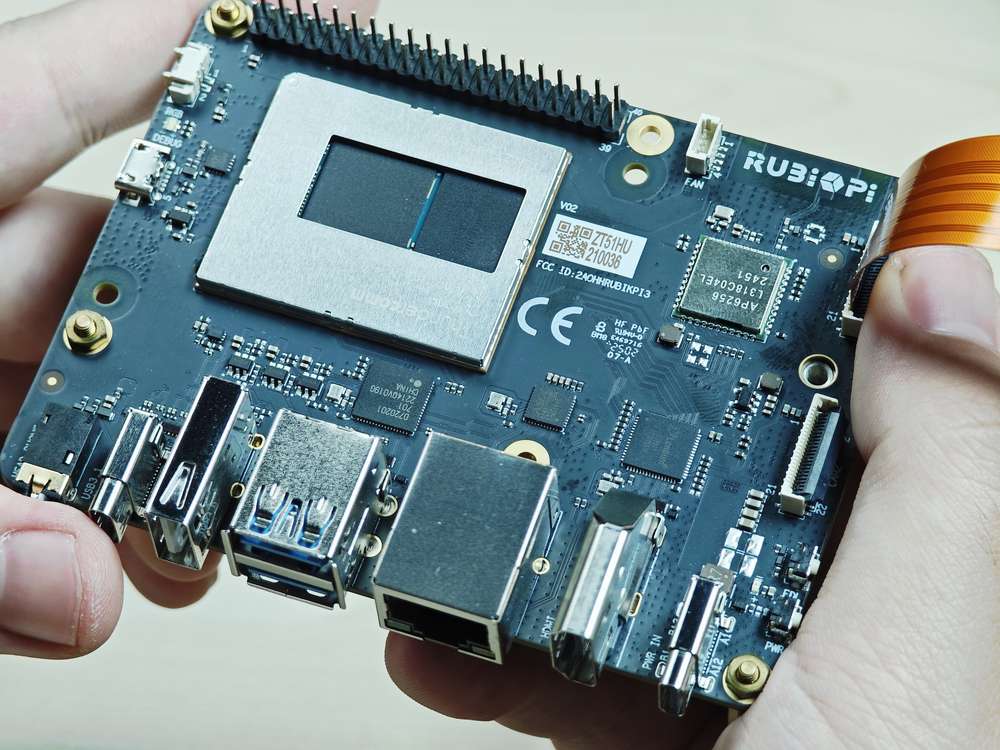
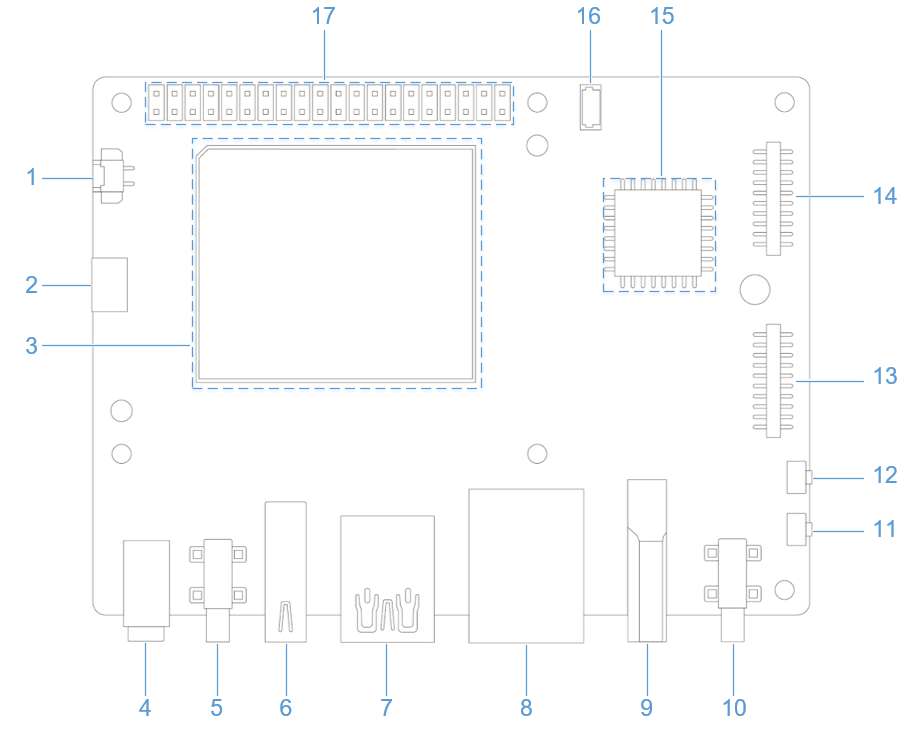
Connect cameras to connectors 13 and 14 in the following figure.
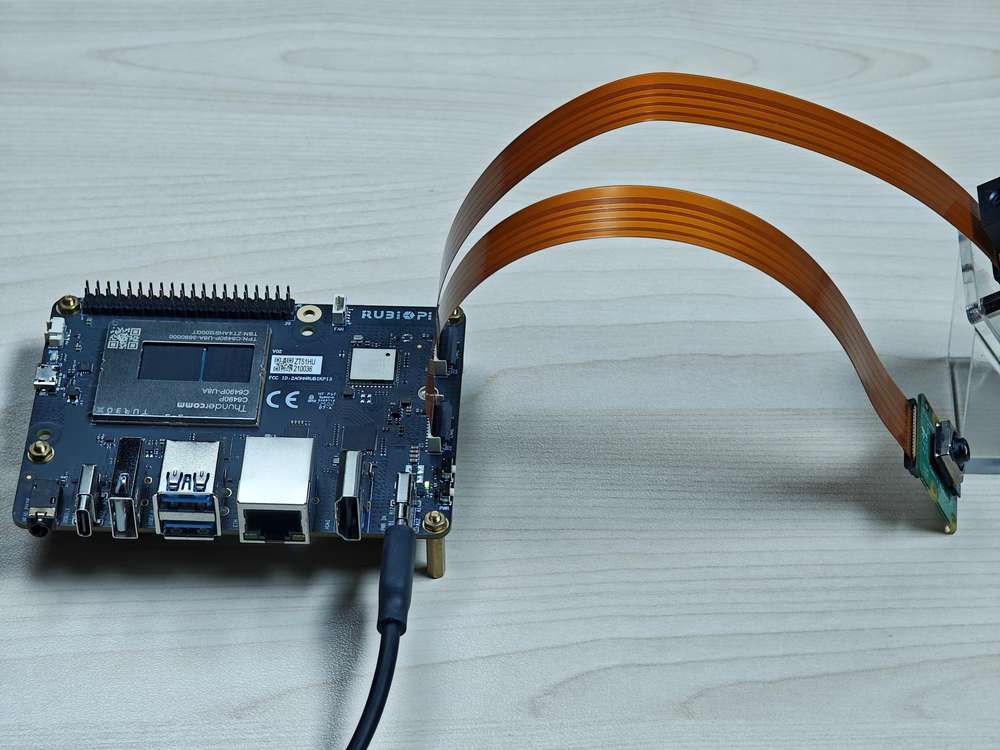
The following picture shows the physical connection:
Pre-requisites
On Target
- Ubuntu OS should be flashed
- Terminal access with appropriate permissions needs to be enabled.
- If you haven’t previously installed the PPA packages, please run the following steps to install them.
 git clone -b ubuntu_setup --single-branch https://github.com/rubikpi-ai/rubikpi-script.git
 cd rubikpi-script
 ./install_ppa_pkgs.sh
- Test taking photos
# CAM1, output file /opt/img0_123.jpggst-launch-1.0 -e qtiqmmfsrc camera=0 ! video/x-raw,format=NV12,width=1280,height=720,framerate=30/1 ! queue ! jpegenc ! queue ! multifilesink location=/opt/img0_%d.jpg max-files=5# CAM2, output file /opt/img1_123.jpggst-launch-1.0 -e qtiqmmfsrc camera=1 ! video/x-raw,format=NV12,width=1280,height=720,framerate=30/1 ! queue ! jpegenc ! queue ! multifilesink location=/opt/img1_%d.jpg max-files=5
Troubleshoot camera issues
If the camera fails to display or capture ../images, check the following contents:
-
Check the camera module connection.
For details, refer to Connect the camera cable.
-
Run the following command to collect logs.
journalctl -f > /opt/log.txtSearch for "probe success" in the logs. "probe success" indicates that the camera module is powered on and responding to I2C control. If the sensor does not have the "probe success" log, the possible cause is the flex cable connection or camera module issue.
The following log indicates that an IMX477 is detected:
[ 80.645992] CAM_INFO: CAM-SENSOR: cam_sensor_driver_cmd: 939: Probe success,slot:7,slave_addr:0x34,sensor_id:0x477, is always on: 0 -
Check the camera sensor driver command.
Collect logs using the
journalctl -f > /opt/log.txtcommand and search for "cam_sensor_driver_cmd" in the logs. "CAM_START_DEV Success" indicates that the camera sensor streaming started. "CAM_STOP_DEV Success" indicates that the camera sensor streaming has stopped. For example:start:[ 81.172814] CAM_INFO: CAM-SENSOR: cam_sensor_driver_cmd: 1129: CAM_START_DEV Success, sensor_id:0x477,sensor_slave_addr:0x34stop:[ 88.905241] CAM_INFO: CAM-SENSOR: cam_sensor_driver_cmd: 1157: CAM_STOP_DEV Success, sensor_id:0x477,sensor_slave_addr:0x34 -
Check the sensor streaming.
Enable the CSID SOF/EOF IRQ logs, then execute the camera streaming command.
mount -o rw,remount /usrmount -t debugfs none /sys/kernel/debug/echo 0x8 > /sys/module/camera/parameters/debug_mdlecho 3 >/sys/kernel/debug/camera_ife/ife_csid_debugecho 1 > /sys/kernel/tracing/tracing_onecho 1 > /sys/kernel/tracing/events/camera/cam_log_debug/enableecho 2 > /sys/module/camera/parameters/debug_typecat /sys/kernel/tracing/trace_pipe > trace.txtThe captured logs provide detailed information about the Start of Frame (SOF) and End of Frame (EOF). In the trace.txt log, search for "irq_status_ipp".
-
BIT12 (0x1000) represents the SOF packet.
-
BIT9 (0x200) represents the EOF packet.
The log will appear as follows:
<idle>-0 [000] d.h1. 19287.546764: cam_log_debug:CAM_DBG: CAM-ISP: cam_ife_csid_irq: 4996: irq_status_ipp = 0x1110 cam-server-25604 [000] dNH.. 19287.561705: cam_log_debug:CAM_DBG: CAM-ISP: cam_ife_csid_irq: 4996: irq_status_ipp = 0xee8 -